Dome: Unterschied zwischen den Versionen
aus Metalab Wiki, dem offenen Zentrum für meta-disziplinäre Magier und technisch-kreative Enthusiasten.
Zur Navigation springenZur Suche springen| Zeile 3: | Zeile 3: | ||
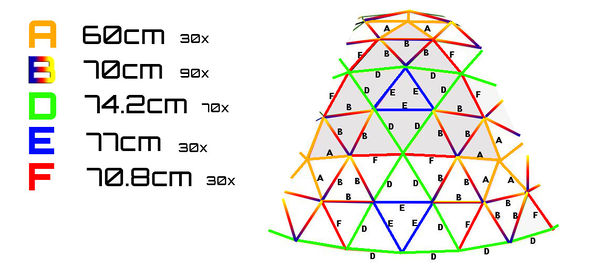
[[Datei:Dome_assembly-instruction.jpg|600px|thumb|center|the overview]] | [[Datei:Dome_assembly-instruction.jpg|600px|thumb|center|the overview]] | ||
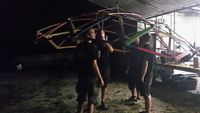
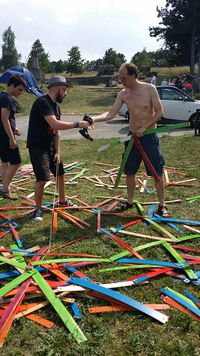
| − | [[Datei:dome_build.jpg|200px|thumb|right|Construction | + | [[Datei:dome_build.jpg|200px|thumb|right|Construction]] |
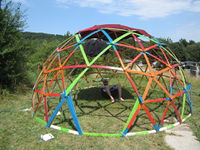
[[Datei:dome_done.jpg|200px|thumb|right|Done!]] | [[Datei:dome_done.jpg|200px|thumb|right|Done!]] | ||
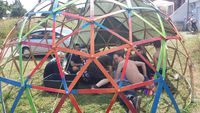
[[Datei:dome_kuschelig.jpg|200px|thumb|right|Cosy]] | [[Datei:dome_kuschelig.jpg|200px|thumb|right|Cosy]] | ||
[[Datei:dome_down.jpg|200px|thumb|right|Deconstruction (~10 minute with 5 guys)]] | [[Datei:dome_down.jpg|200px|thumb|right|Deconstruction (~10 minute with 5 guys)]] | ||
| + | |||
| + | == Preparation=== | ||
You need: | You need: | ||
| Zeile 59: | Zeile 61: | ||
| − | ==Assembly== | + | ===Assembly=== |
Start with 5 pcs type A struts (orange) | Start with 5 pcs type A struts (orange) | ||
| Zeile 74: | Zeile 76: | ||
| − | * MIDDLE (A) outermost | + | * MIDDLE (A) outermost layer |
| − | * LEFT (B) middle | + | * LEFT (B) middle layer |
*RIGHT(B) innermost layer | *RIGHT(B) innermost layer | ||
and thats how you go on according to the diagram above. | and thats how you go on according to the diagram above. | ||
| Zeile 82: | Zeile 84: | ||
This is true for the whole assembly. | This is true for the whole assembly. | ||
| − | Take a corner of a triangle, consider that "middle" and connect left and right to it. | + | Take a corner of a triangle, consider that "middle" and connect first left and then right to it. |
| − | ==Links== | + | ===Links=== |
[http://www.domerama.com/calculators/4v-geodesic-dome-calculator/ DOMERAMA online dome calculator] | [http://www.domerama.com/calculators/4v-geodesic-dome-calculator/ DOMERAMA online dome calculator] | ||
| Zeile 91: | Zeile 93: | ||
| − | == TODO== | + | === TODO=== |
* measure the sizes of the different triangles / create different inlays with mirors and out of acrylic | * measure the sizes of the different triangles / create different inlays with mirors and out of acrylic | ||
* measure the top / center pentagon for replacement with solid wood | * measure the top / center pentagon for replacement with solid wood | ||
| Zeile 98: | Zeile 100: | ||
* add 71 leds | * add 71 leds | ||
* make ledmount | * make ledmount | ||
| + | |||
| + | [[Kategorie:Howto]] | ||
| + | [[Kategorie:Projekte]] | ||
Version vom 20. Juli 2015, 12:37 Uhr
MIDDLE - LEFT - RIGHT
Preparation=
You need:
- 250 bars (get 270+ to have some spareparts) the inner parts of slatted frames for beds work great
- 91 M6 screws (length: 80 mm)
- 91 Wing nuts
- 182 Washers (the bigger the better)
- Spray paint (RED,GREEN,BLUE,ORANGE)
Cut them in 5 different lengths.
| Type | Color | Pcs. | Length |
| A | ORANGE | 30 | 60cm |
| B | RAINBOW | 90 | 70cm |
| D | GREEN | 70 | 74.2cm |
| E | BLUE | 30 | 77cm |
| F | RED | 30 | 70.8cm |
Drill a hole 2cm from the border in the middle of the struts ends.
Assembly
Start with 5 pcs type A struts (orange) Connect them like this: WASHER, SCREW, 5 BARS (A),WASHER,WING NUT, dont over tighten yet
You successfully put together the middle structure that will be on the center top of the dome.
Now from the end of these connect 5 type B struts. The magic formular is:
MIDDLE - LEFT - RIGHT
- MIDDLE (A) outermost layer
- LEFT (B) middle layer
- RIGHT(B) innermost layer
and thats how you go on according to the diagram above.
This is true for the whole assembly.
Take a corner of a triangle, consider that "middle" and connect first left and then right to it.
Links
DOMERAMA online dome calculator
TODO
- measure the sizes of the different triangles / create different inlays with mirors and out of acrylic
- measure the top / center pentagon for replacement with solid wood
- add sprinklers for water
- add ventilator
- add 71 leds
- make ledmount
