Blinkenwall.com/Controller: Unterschied zwischen den Versionen
Anlumo (Diskussion | Beiträge) K (made the preview larger) |
Anlumo (Diskussion | Beiträge) |
||
| (2 dazwischenliegende Versionen von 2 Benutzern werden nicht angezeigt) | |||
| Zeile 3: | Zeile 3: | ||
= Blinkenwall Controller = | = Blinkenwall Controller = | ||
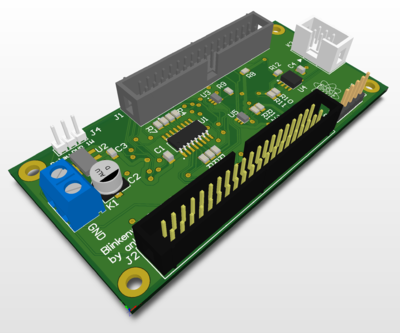
[[Datei:Blinkenwall_Controller.png|400px|thumb|right|The PCB designed for the controller adapter (made in Altium Circuitmaker)]] | [[Datei:Blinkenwall_Controller.png|400px|thumb|right|The PCB designed for the controller adapter (made in Altium Circuitmaker)]] | ||
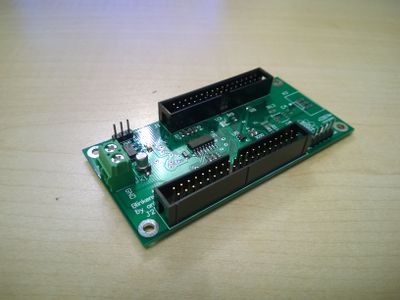
| + | [[Datei:Blinkenwall_Controller_assembled.jpg|400px|thumb|right|Looks exactly like in the render!]] | ||
| − | Case is from a Sun Cobalt RaQ 550. The controller for the Blinkenwall is an [http://www. | + | Case is from a Sun Cobalt RaQ 550. The controller for the Blinkenwall is an [http://www.up-board.org/up/ up-board]. |
| − | We | + | We developed an adapter PCB from the front panel to the up-board (or any other board compatible with the Raspberry Pi GPIO header). |
== Front Panel == | == Front Panel == | ||
| Zeile 55: | Zeile 56: | ||
|} | |} | ||
| − | The transceiver is used so that you can put the display data pins and the buttons on the same GPIOs. It's a [ | + | The transceiver is used so that you can put the display data pins and the buttons on the same GPIOs. It's a [http://img.cleverworldnet.com/tmp/74F245PC__001.pdf 74F245]. The display is a [https://www.mouser.com/ds/2/178/16216l5-16494.pdf HDM16216L-5-LCEP]. |
The voltage is 5V for everything, except for the buttons. These simply pull to GND and have a 4.7kΩ pullup. | The voltage is 5V for everything, except for the buttons. These simply pull to GND and have a 4.7kΩ pullup. | ||
Aktuelle Version vom 26. August 2017, 23:41 Uhr
| Language: | English |
|---|
Blinkenwall Controller
Case is from a Sun Cobalt RaQ 550. The controller for the Blinkenwall is an up-board.
We developed an adapter PCB from the front panel to the up-board (or any other board compatible with the Raspberry Pi GPIO header).
Front Panel
The front panel has the following connector:
| Function | Pin | Pin | Function |
|---|---|---|---|
| Display Enable | 1 | 2 | Transceiver !OE |
| GND | 3 | 4 | +5V |
| Display D1 | 5 | 6 | Display D0 |
| Display D3, Button Up | 7 | 8 | Display D2, Button Left |
| Display D5, Button Right | 9 | 10 | Display D4, Button Down |
| Display D7, Button S | 11 | 12 | Display D6, Button E |
| Display RS | 13 | 14 | Display R/W |
| GND | 15 | 16 | +5V |
| LED Cathode "Earth" | 17 | 18 | NC |
| LED Cathode "HD 1" | 19 | 20 | LED Cathode "LAN 1" |
| LED Cathode "HD 2" | 21 | 22 | LED Anode "Wrench" |
| LED Anode Power Button (two LEDs in parallel!) | 23 | 24 | LED Cathode "ETH 1" |
| LED Cathode "LAN 2" | 25 | 26 | Button Power (with HW debouncing) |
| GND | 27 | 28 | +5V |
| NC | 29 | 30 | NC |
| LED Cathode "ETH 2" | 31 | 32 | NC |
| NC | 33 | 34 | NC |
The transceiver is used so that you can put the display data pins and the buttons on the same GPIOs. It's a 74F245. The display is a HDM16216L-5-LCEP.
The voltage is 5V for everything, except for the buttons. These simply pull to GND and have a 4.7kΩ pullup.
Display
The display is HD44780-compatible. According to the book "Microcontrollers: From Assembly Language to C Using the PIC24 Family", it has TTL-level inputs, so 3.3V logic level can drive it. Thus, no logic level shifter is required.
LEDs
All LEDs except for the wrench and the power LEDs are common anode. Specs: If=10mA, Uf=~2.05V
All LEDs except for the wrench are green.
The two power LEDs are in parallel (wtf), Specs: If=20mA, Uf=2.04V
Wrench (orange!): If=10mA, Uf=2V
Thus, all LEDs except for the power LEDs need a 330Ω resistor. The power LEDs need a 150Ω resistor.
The 7 regular LEDs can be driven by a TLC6C598CQDRQ1. The power LEDs should be driven from the 5V supply of the ODROID C1 directly, the wrench is still an open question (what do we want to do with that?).
ODROID C1 Pin Assignments
The ODROID C1 can drive all hardware, except for the power button. Unfortunately, there is no software power button on this device, only the enable pin of the power controller is exposed (separately to the 40pin GPIO header). So, this has to be done by something like an ATTiny16:
- If off and power button is pressed, pull down !output enable.
- If on and power button is pressed, signal a shutdown to the device, wait until a separate GPIO is no longer pulled, then pull up !output enable.
Maybe this can be solved without a microcontroller?
Here's my preliminary suggestion for pin assignments on the 40pin GPIO port:
- Display Enable: GPIO 83
- Transceiver !OE: GPIO 88
- Display RS: GPIO 76 (shared with I2CB_SDA, but we don't need that)
- Display R/W: GPIO 77 (shared with I2CB_SCL, but we don't need that)
- Display D0: GPIO 116
- Display D1: GPIO 115
- Display D2: GPIO 104
- Display D3: GPIO 102
- Display D4: GPIO 103
- Display D5: GPIO 118
- Display D6: GPIO 101
- Display D7: GPIO 100
- LEDs: SPI via TLC6C598CQDRQ1: MOSI/SCLK/CE0
- TLC6C598CQDRQ1 pin G: GPIO 108
- TLC6C598CQDRQ1 pin CLR: GPIO 97
- Blinkenwall relay: GPIO 99
- Power OFF: GPIO 98
- Power feedback: GPIO 87
Cobalt RaQ Links
- http://www.t2-project.org/packages/lcdutils.html (lcdutils-0.2)
- https://github.com/uberlinuxguy/rpi-cobalt (docs)

