Usblinky: Unterschied zwischen den Versionen
Benko (Diskussion | Beiträge) (link fix) |
|||
| Zeile 61: | Zeile 61: | ||
But this microcontroller was too small to do fancy effects and so i made a completely new design for this job. | But this microcontroller was too small to do fancy effects and so i made a completely new design for this job. | ||
Later on I finally found a reason to check out [ | Later on I finally found a reason to check out [http://www.openscad.org/ OpenSCAD] and boy do I like that. What a great tool! | ||
I made a fully parametric design to use with the usblinky as a psychedelic nightlight. | I made a fully parametric design to use with the usblinky as a psychedelic nightlight. | ||
Version vom 13. März 2015, 08:50 Uhr
What
usblinky
- is a small usb stick with 4 wires on on end
- controls up to 150 addressable RGB lights (for example WS2812B)
- can run stand alone from a USB power supply once programmed
- consists of:
- ATTINY85
- micronucleus 1.11 bootloader based on vUSB
{{#ev:youtube|iY2UvfaMfJs}} {{#ev:youtube|cYPhyNVSkh4}}
(in case there is no embedded video look here and here
Software
usblinky uses the micronucleus bootloader that speaks USB in software and enables the ATTINY85 to be programmed directly over USB.
A modified arduino environment for this task can be found here
All the sources are available on github.
How / Why
I started this project after pl, chris and I went to make munich 2015 to represent the metalab and the hackerspaceshop.com project there.
It was a blast!
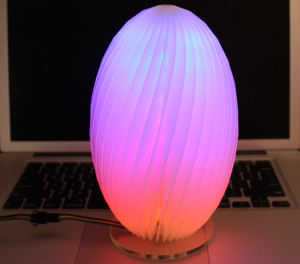
On the second day a guy asked for a microcontroller and a high power led to illuminate a 3D-printed vase he made.
We had no Highpower RGB leds on hand but we gave him a microcontroller and a piece of ws2812 ledstrip (thanks to pl for that great idea!)
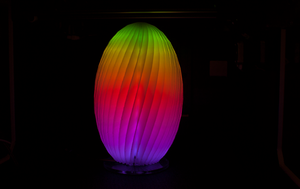
Turns out it looked pretty groovy.
So the next day the guys returned the microcontroller and ledstrip and asked if this could be available as a kit.
I said that a full blown ATMEGA32U4 is a waste of resources for that kind of application.. and this is how this project started.
Johannes from ehajo was also there showing off a usbstick with an attiny2313 on board that can be used as a AVR programmer.
I got a handful of these sticks and made a new firmware to drive ledstrips with it.
But this microcontroller was too small to do fancy effects and so i made a completely new design for this job.
Later on I finally found a reason to check out OpenSCAD and boy do I like that. What a great tool!
I made a fully parametric design to use with the usblinky as a psychedelic nightlight.
Alternate usecases
A usblinky stick was used in the selfiebooth installed for the time travellers party.
This stick illuminated a big white button that spits out "PING\n" over USB keyboard when pressed
Pitfalls and lessons learned
Adafruit Trinket
Adafruit built another bootloader that uses a similar trick than micronucleus.
They speak USB over vUSB but enumerate the device as a usbtiny programmer.
The arduino sees a programmer and programms the ATTINY85 as a target, when it actually overwrites its own FLASH with the user program.
I liked that nifty approach and used the Trinket bootloader when i started this project.
But then i read that adafruit does not want you to use their USB ID in a product that you sell.
I contacted them but got no meaningful reply, only a standardized answer that i should come back once my product launched.
Later on i found out that the bootloader on the trinket is fragile.
Under some special circumstances it can happen that the bootloader falsy triggers and the FLASH on the MCU is damaged and it can not be programmed any more over USB.
It can still be recovered with a dedicated programmer but this was to fragile for my usecase.
Digispark / micronucleus
That was the point that i took a closer look at the micronucleus bootloader.
This bootloader is significantly smaller (2k versus 3.5k) and the code is much more straight forward than the trinket bootloader.
The drawback is that you need to modify the Arduino environment a little more than with the Adafruit Tinket but there are packages available for that.
When I used the usblinky as a BUTTON for the selfiebooth setup I realized that the pinout differs on the trinket.
D+ and D- are swapped on the MCU side.
In theory not a big deal, but a lot of libraries that are available for the digispark project (for example the USB keyboard emulation) has this pinout hardcoded and I needed to modify the .cpp files in the Arduino environment to make that work.
Future versions of USBlinky have the pins swapped as on the original digispark design.
Merging the .hex files
When i programmed the first few usblinky sticks i just uploaded the bootloader and flashed the usblinky program later directly over USB.
That worked great but was timeconsuming, so i looked into merging the bootloader and the userprogram into one .hex file to flash at once.
Turns out that is difficult.
I tried many different approaches but didn't succeed till I did this:
- flash the bootloader
- write the prgram over USB
- read back the flash from the attiny (avrdude -p attiny85 -P usb -c usbtiny -U flash:r:flash.hex:i)
- write that dump to future usblinky sticks.
All the relevant script for reading and writing and a script for semi-automated flashing in a loop can be found here on github
Who
- Overflo -The whole USBLINKY project.
- clifford, marius - OpenSCAD THANK YOU!!
- cs - vUSB from OBDEV is amazing. Thank you so much.


