Freepad: Unterschied zwischen den Versionen
aus Metalab Wiki, dem offenen Zentrum für meta-disziplinäre Magier und technisch-kreative Enthusiasten.
Zur Navigation springenZur Suche springen
Consti (Diskussion | Beiträge) Keine Bearbeitungszusammenfassung |
Consti (Diskussion | Beiträge) Keine Bearbeitungszusammenfassung |
||
| Zeile 4: | Zeile 4: | ||
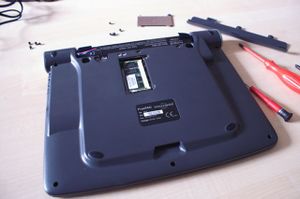
<div class="tright" style="clear:none">[[Bild:Freepad 3.jpg|thumbnail|Freepad Rückseite (Oben: Akku, Mitte: Speicher)]]</div> | <div class="tright" style="clear:none">[[Bild:Freepad 3.jpg|thumbnail|Freepad Rückseite (Oben: Akku, Mitte: Speicher)]]</div> | ||
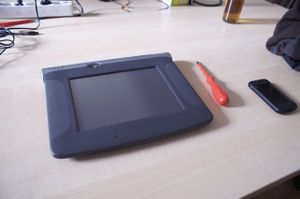
<div class="tright" style="clear:none">[[Bild:Freepad 1.jpg|thumbnail|Ein Freepad]]</div> | <div class="tright" style="clear:none">[[Bild:Freepad 1.jpg|thumbnail|Ein Freepad]]</div> | ||
The owner of http://Arc-Computer.de sent us five Freepads for free! | |||
Before using the Freepads the first time, please make sure the battery is connected to Freepad Motherboard (otherwise, you'll only be able to use it while being connected to the power adapter). To connect the battery you'll need to turn it upside down, unscrew the top three screws and connect the battery to the mainboard. | |||
<br style="clear:both" /> | <br style="clear:both" /> | ||
| Zeile 12: | Zeile 12: | ||
== Hardware == | == Hardware == | ||
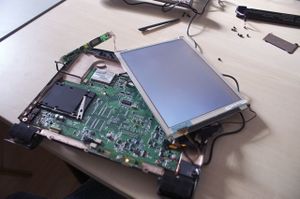
[[Bild:Freepad offen.jpg|thumbnail|Freepad Geöffnet]] | [[Bild:Freepad offen.jpg|thumbnail|Freepad Geöffnet]] | ||
* x86 | * x86 compatible "Geode"-Microcontroller (National Semiconductor, 166 MHz) | ||
* 16 MByte FlashROM | * 16 MByte FlashROM / 32 MByte Maincache | ||
* DECT | * DECT | ||
* Smartcard Reader | * Smartcard Reader | ||
* Audio-In, Audio-Out | * Audio-In, Audio-Out | ||
* Microphone, | * Microphone, Stereospeakers | ||
* Touchscreen (800x600?) | * Touchscreen (800x600 resolution?) | ||
<br style="clear:both" /> | <br style="clear:both" /> | ||
== Software == | == Software == | ||
* NanoX | * NanoX as Display System | ||
* Opera | * Opera as Browser | ||
<br style="clear:both" /> | <br style="clear:both" /> | ||
| Zeile 31: | Zeile 31: | ||
== Root Access (lokal) == | == Root Access (lokal) == | ||
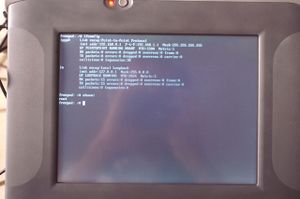
[[Bild:Freepad root.jpg|thumbnail|Freepad mit Root Access]] | [[Bild:Freepad root.jpg|thumbnail|Freepad mit Root Access]] | ||
Root-Access | Root-Access on a Out-Of-The-Box Freepad: | ||
* USB- | * connect USB-Keyboard | ||
* | * turn the device on | ||
* | * wait until the webbrowser has loaded | ||
* | * CTRL-ALT-F2 will bring up the shell - you are root! | ||
<br style="clear:both" /> | <br style="clear:both" /> | ||
Version vom 4. November 2008, 17:38 Uhr
Freepad
Allgemein
The owner of http://Arc-Computer.de sent us five Freepads for free!
Before using the Freepads the first time, please make sure the battery is connected to Freepad Motherboard (otherwise, you'll only be able to use it while being connected to the power adapter). To connect the battery you'll need to turn it upside down, unscrew the top three screws and connect the battery to the mainboard.
Hardware
- x86 compatible "Geode"-Microcontroller (National Semiconductor, 166 MHz)
- 16 MByte FlashROM / 32 MByte Maincache
- DECT
- Smartcard Reader
- Audio-In, Audio-Out
- Microphone, Stereospeakers
- Touchscreen (800x600 resolution?)
Software
- NanoX as Display System
- Opera as Browser
hackpad™
Root Access (lokal)
Root-Access on a Out-Of-The-Box Freepad:
- connect USB-Keyboard
- turn the device on
- wait until the webbrowser has loaded
- CTRL-ALT-F2 will bring up the shell - you are root!


