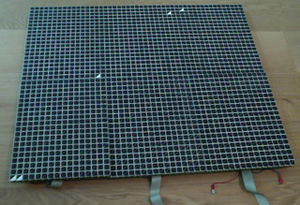
Flipdots: Unterschied zwischen den Versionen
Db spy (Diskussion | Beiträge) |
Leyrer (Diskussion | Beiträge) |
||
| Zeile 64: | Zeile 64: | ||
Achtung, das Panel braucht beim Schalten extrem viel Strom! Unsere Netzteile hier schaffen das nicht. Mit einem ausreichend großen Kondensator sollte man das ausgleichen können. | Achtung, das Panel braucht beim Schalten extrem viel Strom! Unsere Netzteile hier schaffen das nicht. Mit einem ausreichend großen Kondensator sollte man das ausgleichen können. | ||
| + | |||
| + | |||
| + | = Bastelerfahrung von [[Benutzer:leyrer|leyrer]] = | ||
| + | I just played around with Netzteil, Treiberplatine und rpi that came in the yellow box. | ||
| + | |||
| + | * Thanks to [[Benutzer:Pepi|maclemon]], the Raspberry Pi for the Flipdots display now has the static IP4 address: 10.20.42.253 (so just connect it to the ethernet and ssh into it). Username/password are the raspbian defaults. | ||
| + | * The spi-setup script already ran. | ||
| + | * Watch out that you connect the power ot the panel to the correct pins of the Treiberplatine, otherwise the fuse will blow. | ||
| + | |||
| + | Came as far to running the /home/pi/leyrer/flipdots/rpi-demo/demo programm. The display made some noise but no further progress. If you have any tips for me, please let me know. :D | ||
| + | |||
| + | Want: http://youtu.be/7oSH-aZKyU8 & http://youtu.be/x3jkoIyJgoc | ||
Version vom 9. Januar 2014, 20:08 Uhr
Bastelerfahrung von Mathias
Pins von Interesse:
- 3 ROW_DATA
- 5 STROBE
- 7 BLACK_OUTPUT_ENABLE
- 9 WHITE_OUTPUT_ENABLE
- 11 COL_CLOCK
- 13 ROW_CLOCK
- 15 COL_DATA
- 17 ROW_DATA_OUT (zum Kaskadieren)
Einfach gesagt wählt man eine Reihe aus indem man in ROW (pro Panel) 24bit hineinschiebt. Die aktive Reihe wird 1 gesetzt, der Rest 0.
 for(i=0;i<24;i++){
  change_pin(ROW_DATA,i==row);
  toggle_pin(ROW_CLOCK);
 }
Dann kann man gleichzeitig 16-bit in eine Spalte schreiben.
 for(i=0;i<16;i++){
  change_pin (COL_DATA,(data>>i)&1);
  toggle_pin(COL_CLOCK);
 }
Jetzt muss man einmal die Ausgänge im Display mit strobe updaten:
toggle_pin(STROBE);
Und nun wählt man ob die Pixel, welche man in der Spalte vorher gesetzt hat, nach schwarz oder weiß setzt:
 change_pin(BLACK_OUTPUT_ENABLE,!color);
 change_pin(WHITE_OUTPUT_ENABLE,color);
 _delay_us(color?1500:3000);
 change_pin(BLACK_OUTPUT_ENABLE,0);
 change_pin(WHITE_OUTPUT_ENABLE,0);
Und eine Spalte zu beschreiben kann man also die Spalte einmal komplett auf schwarz setzen und dann die weißen Pixel setzen die man will:
 set_row(row,65535,0);
 set_row(row,pixel_mask,1);
oder unauffälliger einfach die toggeln, die man toggeln will.
 mask=old_pixel_mask ^ pixel_mask;
 set_row(row, old_pixel_mask & mask, 0);
 set_row(row, pixel_mask & mask, 1);
Spannungsversorgung
Achtung, das Panel braucht beim Schalten extrem viel Strom! Unsere Netzteile hier schaffen das nicht. Mit einem ausreichend großen Kondensator sollte man das ausgleichen können.
Bastelerfahrung von leyrer
I just played around with Netzteil, Treiberplatine und rpi that came in the yellow box.
- Thanks to maclemon, the Raspberry Pi for the Flipdots display now has the static IP4 address: 10.20.42.253 (so just connect it to the ethernet and ssh into it). Username/password are the raspbian defaults.
- The spi-setup script already ran.
- Watch out that you connect the power ot the panel to the correct pins of the Treiberplatine, otherwise the fuse will blow.
Came as far to running the /home/pi/leyrer/flipdots/rpi-demo/demo programm. The display made some noise but no further progress. If you have any tips for me, please let me know. :D
Want: http://youtu.be/7oSH-aZKyU8 & http://youtu.be/x3jkoIyJgoc
